Evolutionary Neural Networks
tldr;
I built a neural network controlled race car that evolves via evolutionary algorithms. You can check out the surprisingly effective example here.
The Inspiration
When I was young, I remember being fascinated by an episode of NOVA (unfortunately I’ve had little luck finding this particular episode). It featured a computer program that used genetic algorithms to complete simple tasks, like moving forward a set distance. The best performing designs would be printed (this was my first exposure to 3d-printing, far before the original rep-rap even; another idea that wowed young me) and assembled. Notable stories from the interviewed researches told of designs that seemed awkward until they turned it on and it somehow flipped and scurried its way smoothly across the finish line.
That idea of evolving systems within a computer program was fascinating. When I finally decided to go back for my Master’s degree online while working, I decided to “warm up” for extracurricular projects; something I had been skimping on due to a mixture of burnout and free time being eaten by the startup I was employed by at the time.
Evolving Cars
I’ve seen a number of other projects tackle solving a maze, game, or have race cars figure out how to speedily complete a track. This last one was fairly common and seemed like a good starting point. The goal is thus - Have an evolved neural network control a race car until it could successfully complete a track.
The Track
The game plan; create a simple race track app in Python with Pygame first, getting a keyboard-controlled car to be drivable and react to hitting walls; a proof of concept of everything I needed the simulation to do. I chose PyGame as it seemed the simplest way to create a simulation in Python without needing extensive tooling or additional assets. I suspected the ability to quickly create 2D simulations would be useful in homeworks in the Master’s degree as well; a hunch that proved correct. I ended up reaching for the toolkit routinely throughout the course.
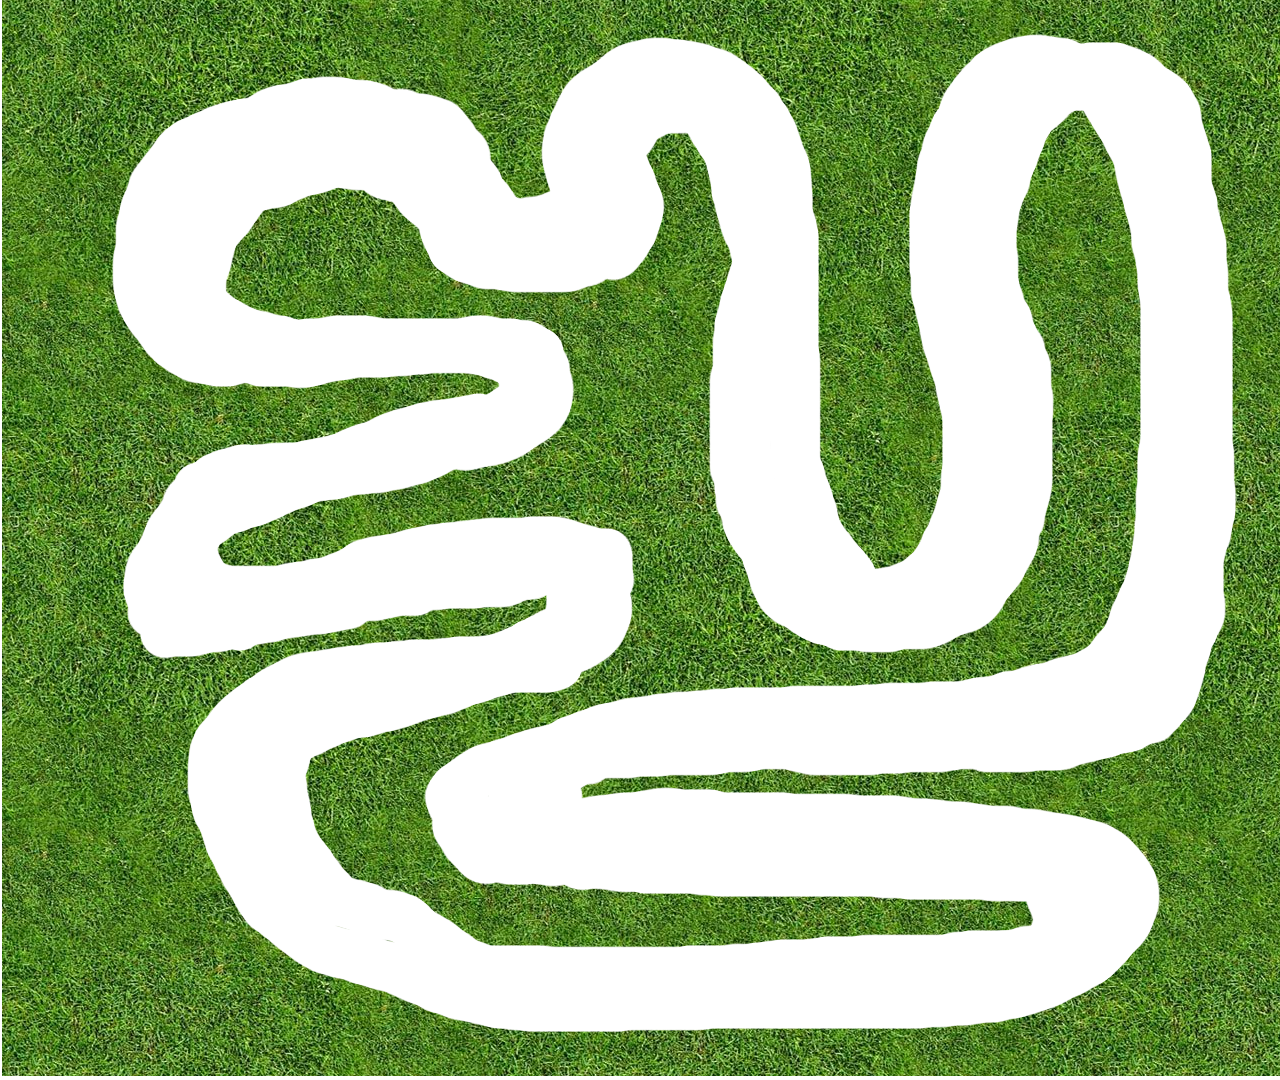
I didn’t want to hard code the tracks or build extensive tooling for building them; I wanted to be generic as possible while still allowing custom tracks to be created. I decided on a simple scheme; a race track is simply an image with a transparency layer; RGBA. Anywhere the png is transparent would show the grey “asphalt” and be counted as track; everything else would be considered impassable terrain towards obstacle/collision detection. This allows you to easily create a track with an image editing tool and prevents me from having to do any sort of hard-coding obstacle detection. This helps as I lack both the patience and any semblance of artistic ability for full track design. It also meant that vehicle/track overlay was a quick pixel overlay check, a quick built in function call for Pygame Sprites.
trackCollisions = pygame.sprite.spritecollide(car, self._tracksg, False, pygame.sprite.collide_mask)
if len(trackCollisions) > 0:
    car.crash(self.get_time_since_start())
Subsystems
Next up was adding the car as a sprite and adding keyboard control. This was necessary for quickly testing subsystems needed for the autonomous car such as track collision and distance measuring, and later scoring systems to use reward shaping to get the desired behavior. We already covered how track collision was handled, so onto the car’s “vision”.
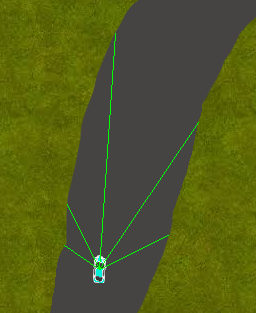
The car essentially emulates a LIDAR sensor with just 5 “sensors” exiting from the front (in practice I just used the center of the car for simplicity’s sake) of the car at 30° increments in each direction. I added a keyboard shortcut that enabled drawing the LIDAR.
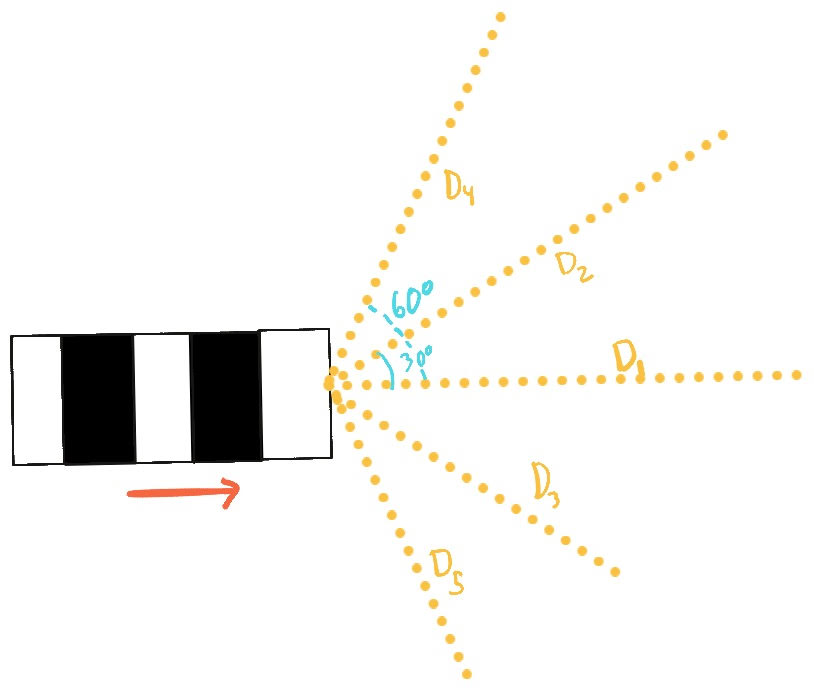
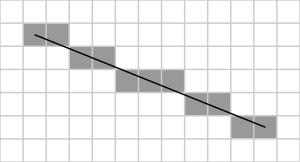
So how were distances calculated? I made use of Bresenham’s Algorithm; given a line, it predicts which pixels along the path would make up that line (think about an angled line in pixels - you have to move in one of 8 cardinal directions instead of any desired angle). I would move along the line pixel by pixel with the track background until I encountered a non-transparent pixel. I would stop drawing here and note the pixel to calculate the euclidean distance for the sensor.
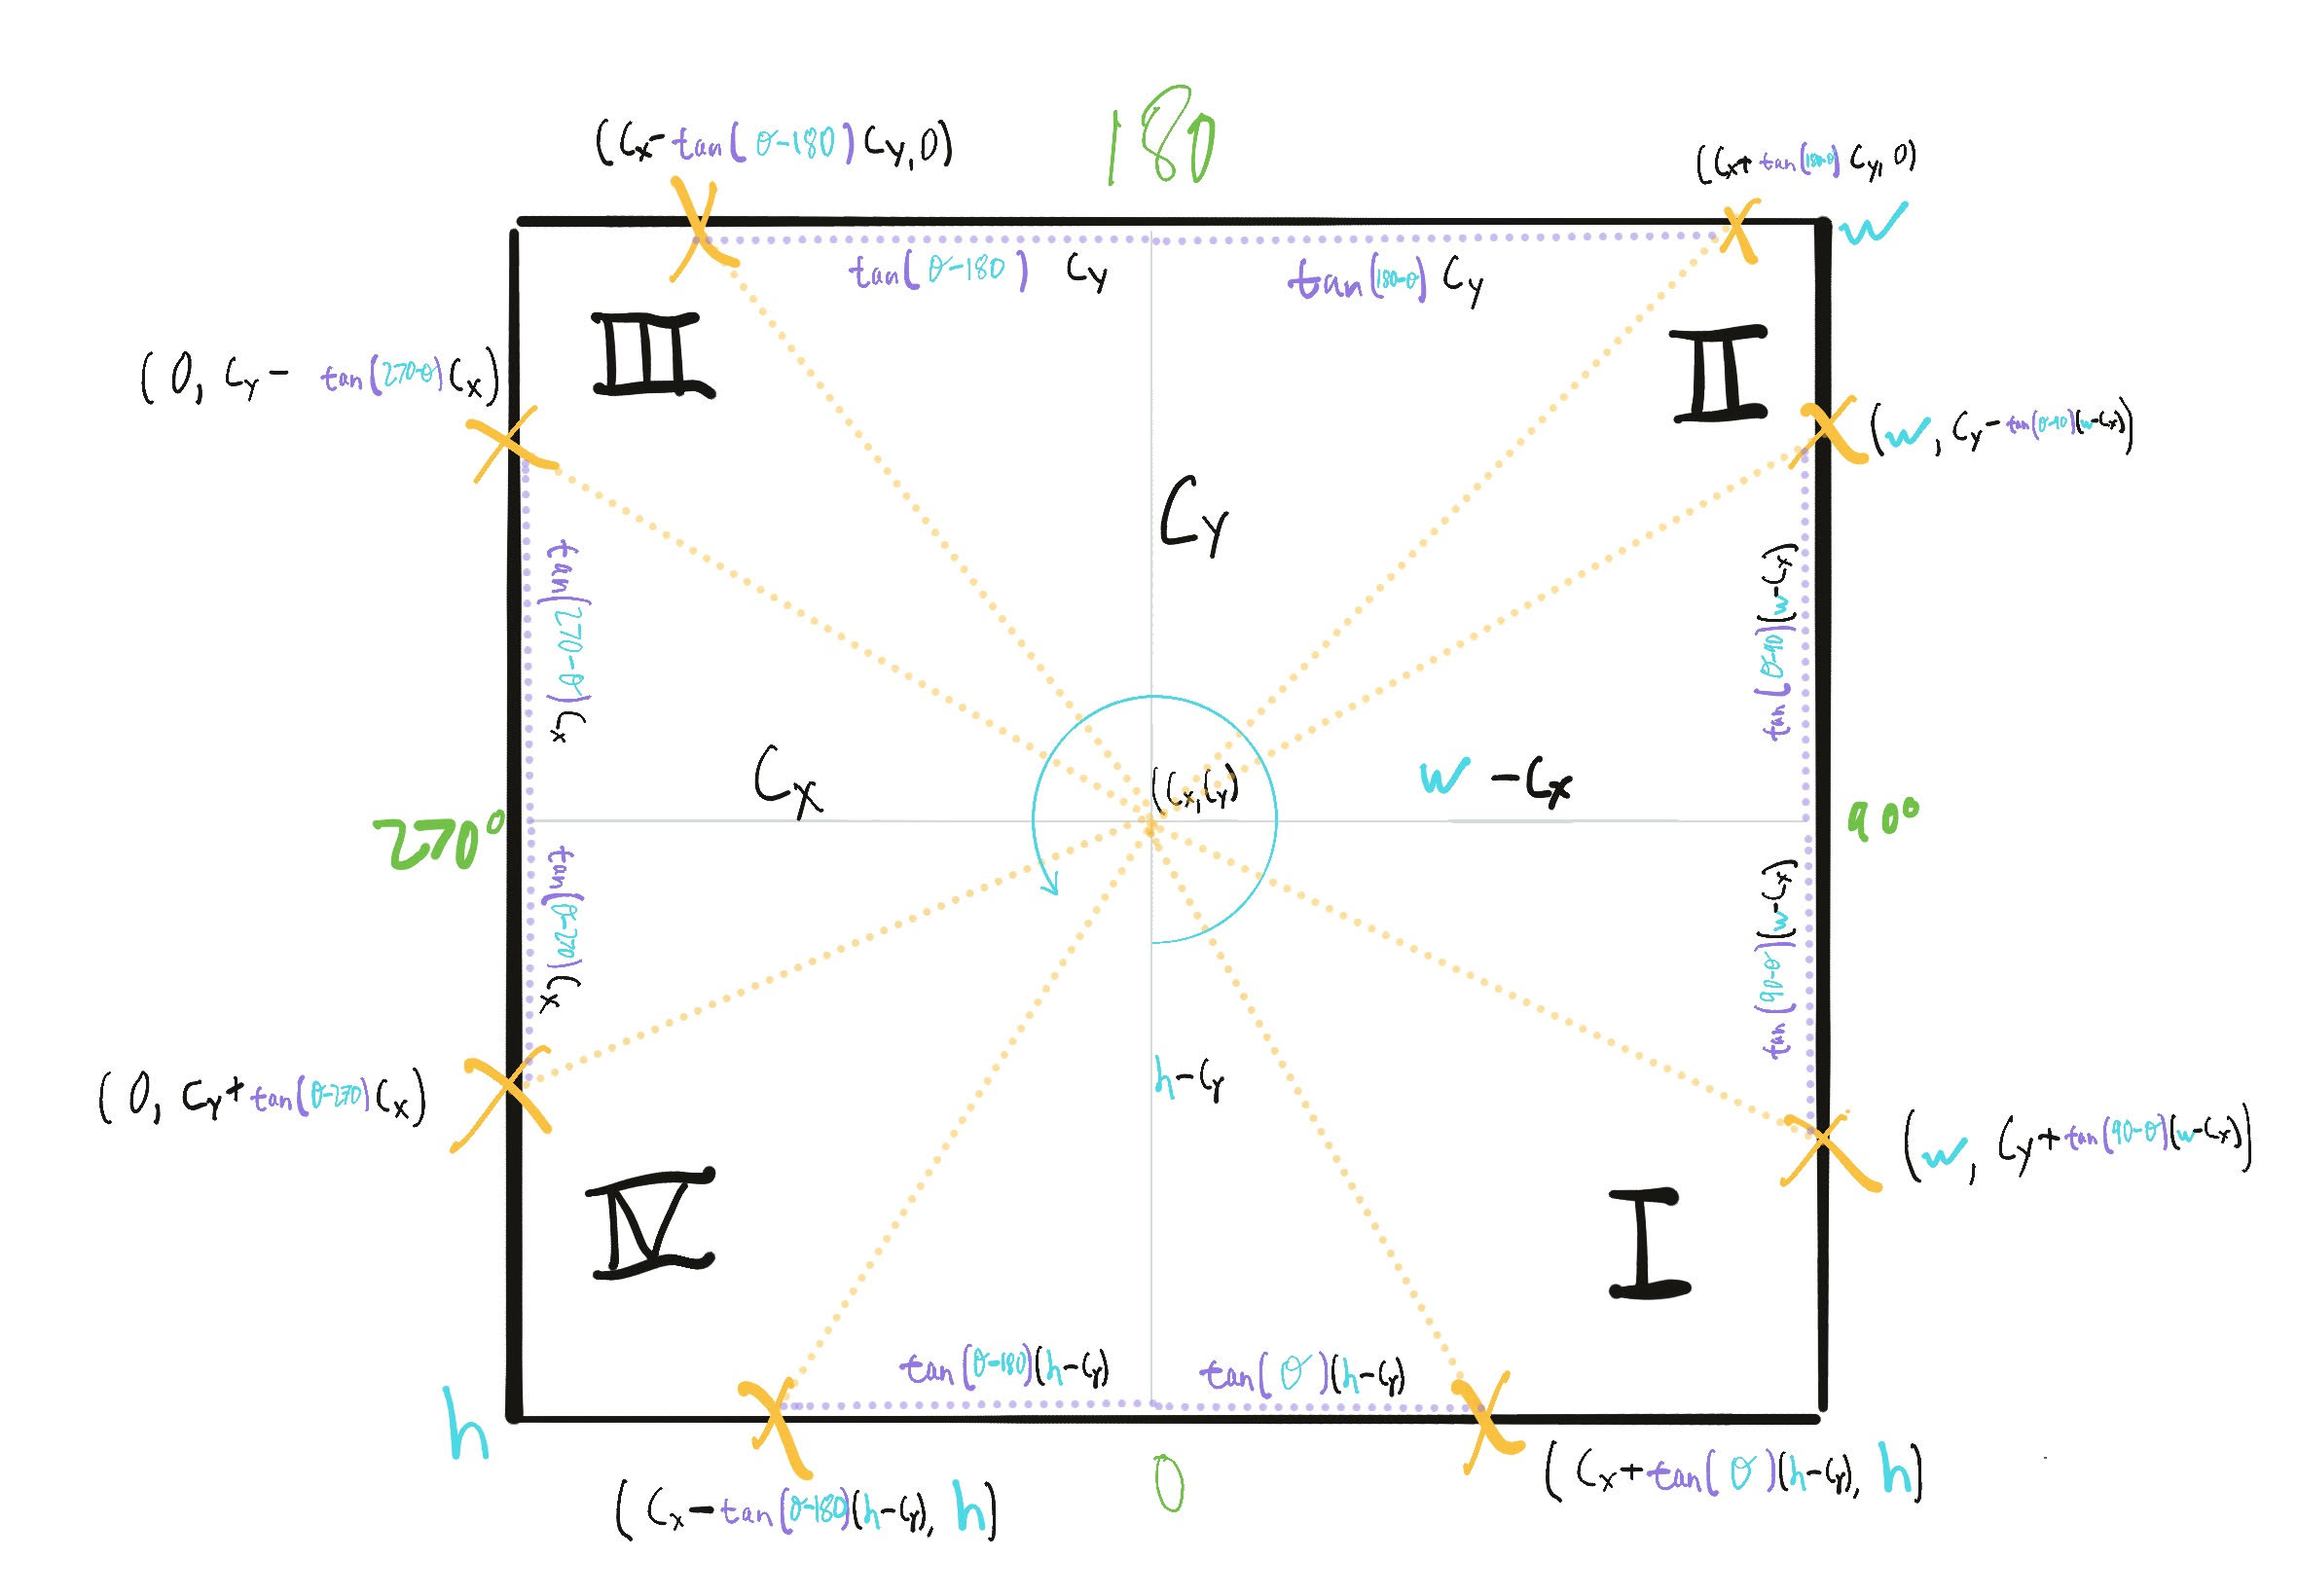
To calculate the distance, it’s just a matter of a bit of trig; I broke it down to different situations based on the available angles. Keeping in mind that the car is rotating as well, and we’re basing this off of the orientation of the car to the world, we have to make note of what quadrant we’re in. Depending on the angle utilized, a separate calculation is used. Note the rotated 0°; this is due to PyGame’s default world orientation (and that fact the whole of your PyGame world is in globally considered in the fourth quadrant, with your upper left corner being (0,0)).
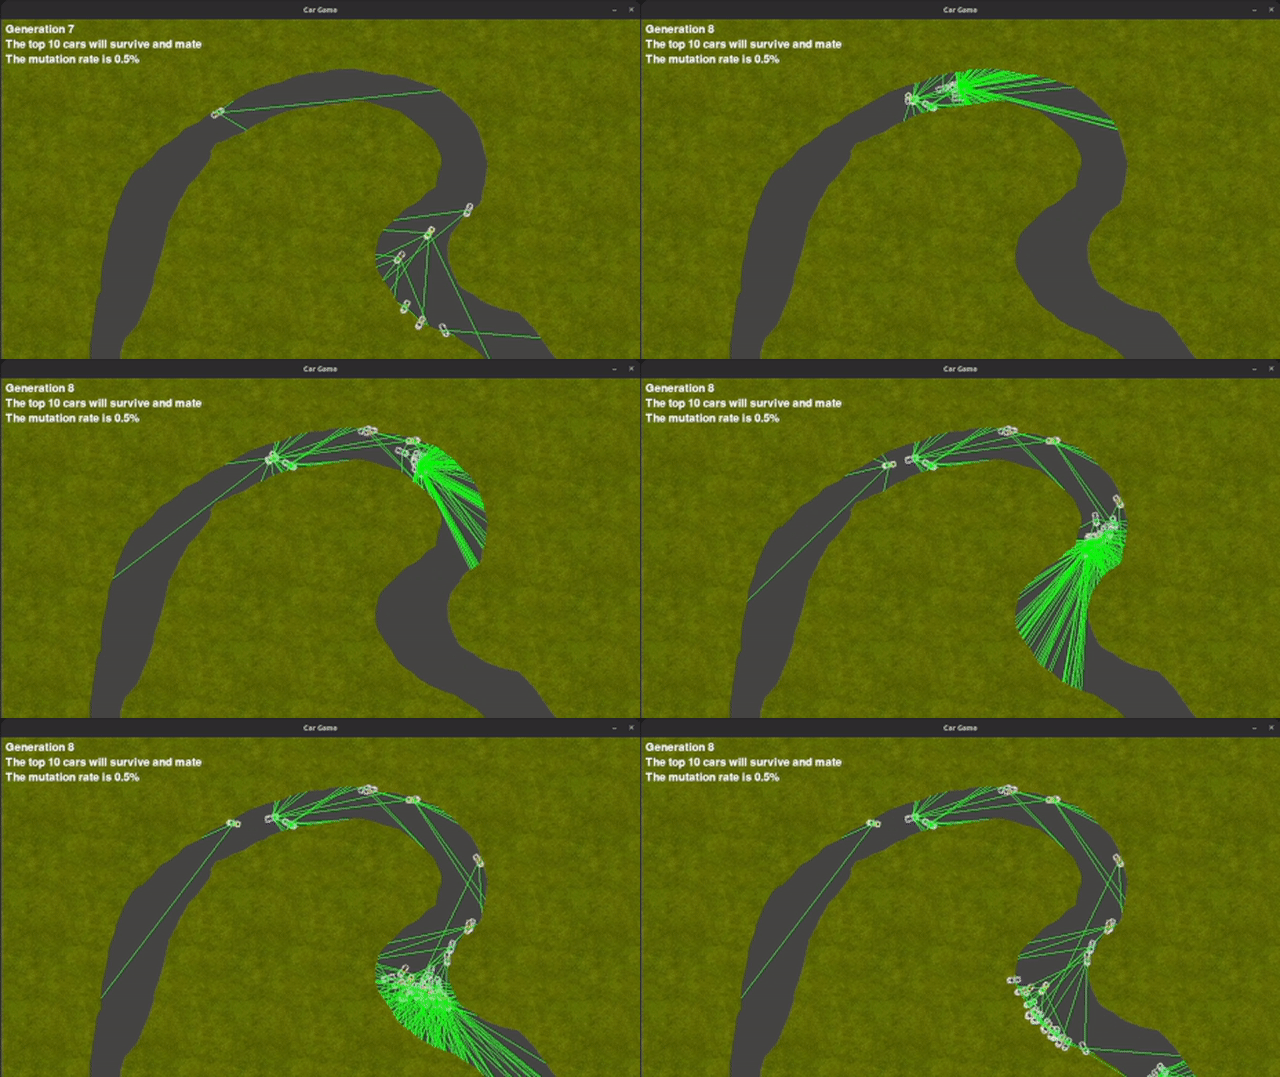
The distance sensor’s don’t pick up other vehicles; this is ideal as the plan is to run multiple cars at once as a singular “generation”. Here we can see a generation of 50 cars with their distance sensors on as they try to navigate through a simple course.
Neural Network Control
How are neural nets going to control this thing? Pretty simply, I take the car’s speed, it’s current rotation relative to the world (in retrospect this might not have been necessary), and then the 5 measured pixel distances from our LIDAR sensors. The network outputs 4 values; acceleration, deceleration, left turn, and right turn. While I used ReLU…
…for the middle layer’s activation function, I used the sigmoid function…
…on the output to limit my output range to the (0, 1]. Acceleration and deceleration would be added together for a singular total delta, as would left/right turning values. The applied delta would be put onto the car in motion at each frame.
Survival of the Fittest
A single generation of N (usually 50 but adjustable) vehicles would be generated all at once, oblivious to the existence of its peers. Each would have a unique neural net, completely random in the progenitor generation. Each generation would last until either a time limit occurred (default at 60 seconds) or until every car would be registered as “dead” (crashed into the wall in a blaze of glory). I should note that because some car’s networks are convinced that not playing the game is the only winning move, it’ll sit there for the entire 60 seconds; by pressing the n key you can force the current run to end and move onto the next generation.
At the end of each generation, we figure out the rank performance of each car. This leads us to… how do we score the cars' performance?
Reward Shaping
Reward shaping is planning out your reinforcement learning algorithm’s scoring mechanism to guide the preferred behavior of your agent as it tries to maximize (or minimize) its performance. By shaping rewards we can in turn shape the behavior of our agent. Evolutionary pressure is no different.
First, how do we determine whether a vehicle necessarily performed better or worse than a comparable vehicle? We could mark a start point and measure distance from it, but then the vehicles are rewarded for simply getting to the furthest point. We also can’t determine with this method if the car is being rewarded for going backwards.
We need to define a direction and concept of “going around the track”. I wanted to avoid building custom tooling for track creation, but between this and determining a decent “start” position there was no way around it. I created a utility; python create_track.py <img file> output.json will load up your image file and allow the user to draw a starting position. After that, you can draw in “checkpoints”. Here’s the idea behind that:
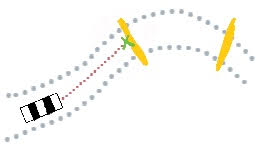
Checkpoints are sequential lines that are “hidden” but detect collision with a vehicle. Instead of triggering a trash it’ll add points to the car’s score based on the amount of time it’s taken for the car to reach the checkpoint. Cars remember which checkpoints they’ve encountered to prevent double-counting a reward.
Finally, once checkpoints are added, a “finish” line is a special checkpoint that “resets” all checkpoints - essentially allowing the car to trigger them again on a second pass (ambitious).
The create_track.py tool uses the mouse to set each; Press the D key to cancel/remove a checkpoint, press enter to stop placing checkpoints and add the finish line. The output.json will store the positions for use in the manual.py and evolve.py programs.
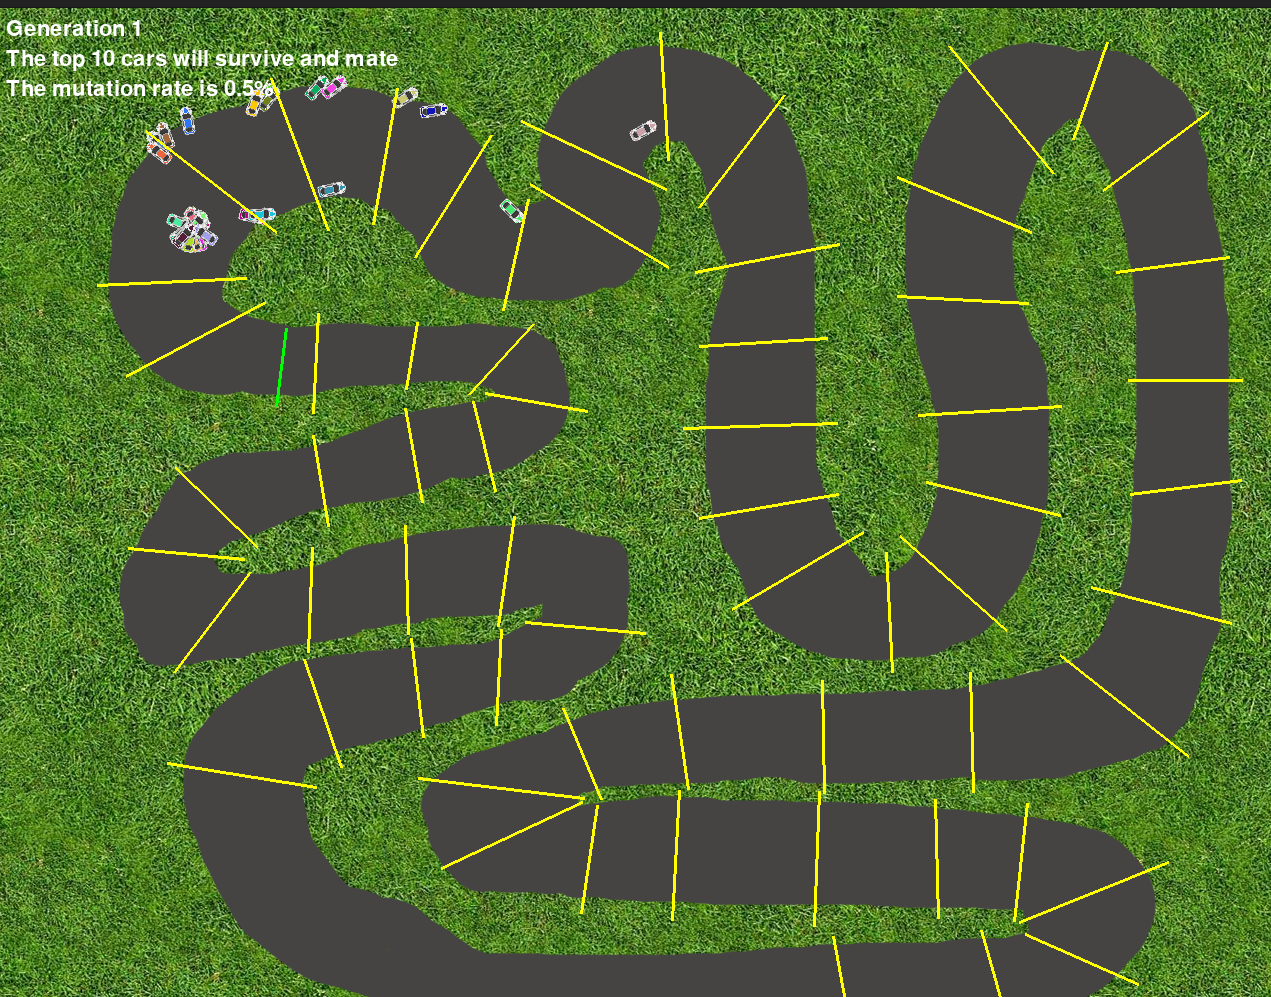
Our final map looks rough, but with the checkpoints and finish line hidden it’s typically not too bad. Press C when running to see the checkpoints.
My final scoring calculations, where s is the seconds elapsed:
| Action | Score |
|---|---|
| Crashing | |
| Crossing a checkpoint | |
| Never crossing a checkpoint |
…the final penalty was added because very early on a car that would cross a checkpoint and crashed may have a similar score than a car that never moved.
Neural Network Mating
So how do you mate two neural networks together? I settled on splicing the neurons together. For each hidden layer we move neuron by neuron, grabbing the weights for each neuron by some percentage.
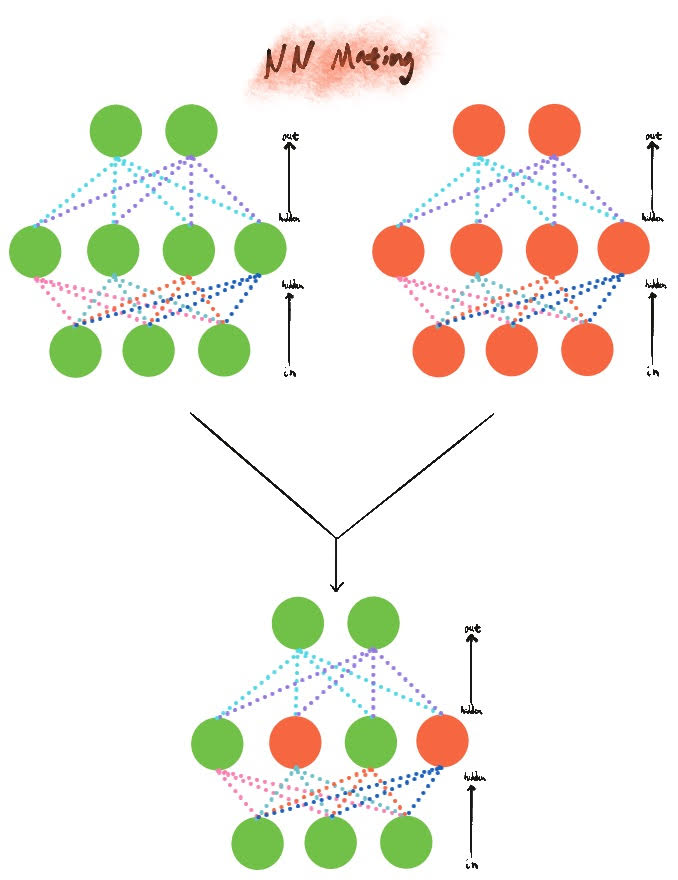
I considered (and built functionality for) a non-50/50 split as well; the idea that a parent’s genes could be stronger. I ultimately abandoned this for a fair split for higher variation.
At each neuron, a mutation percentage chance (usually <1%) could occur. If it does, then the weights at that neuron is chosen entirely randomly.
A preset is set for bringing in the top X performers directly, unchanged, into the next generation, and limit the mating pool entirely. After that mates are chosen from this limited pool based on a weighted probability, where the weight is their score relative to all other cars. Top performers are more likely to be chosen, whereas the worst performers may be skipped entirely.
It is in this manner that I differ from traditional evolutionary algorithms; many would allow all agents, including low performers, a chance to mate, whereas I’m artificially limiting the pool.
Guided Interference
I mentioned earlier that long-running generations were annoying with cars that simply inched along until time expired while the bolder vehicles died out quick, and that I had added the n key to forcibly skip to the next generation. Additional keys were added to allow the user to change the mutation rate ([ and ]) and the number of vehicles to bring forward to the next generation and use for the mating pool. The mutation chance is controlled by ±0.1% via - and +.
The act of manually modifying the expected pool of mates and mutation rates based on performance dramatically increased the rate of convergence in practice.
Results
Shockingly, this thing worked great. I had planned on increasing the number of hidden layers in the network but found that a simple network of a singular hidden layer with 10 neurons was able to learn to drive across all but the hardest of tracks.

Future Improvements
Reviewing this project for this post, I could think of a few key areas for improvements:
Better stoppage detection
The reason I built in the n key to force a stop and get to the next generation was the tricky bit of cars never hitting a checkpoint or a wall, but crawling along for the entirety of the run. Checking distance traveled could and flagging or eliminating cars that failed to perform would improve this and allow it to run without unneeded delays without user intervention.
Checkpoints are kinda weird
Checkpoints are not only annoying to assign, but also mean that there can be a segment of dense or sparse rewards based on their placement. An automated way of spacing them, or designing a better method of detecting forward progress automatically would be ideal.
Automate the manual controls
Modifying the cutoff and limits of the mating pool and mutation rates on the fly leads to a radically faster convergence on desired behaviour, but requires human intervention and intuition. If that intuition can be expressed in some mathematical manner and paired to a smarter reward system, we could be looking at an more advanced and targeted evolutionary system; something that I would be very interested in applying to other problems to see if it can be generalized for other systems.